
Test the water, then choose the filter
An under-sink filter treats the cold water at your kitchen tap, so it should match what is actually in that water. In Shafter, CA we do not give a hardness or contaminant figure, because none is verified for every home. Test your tap first, with a lab kit or a lab report, and buy the filter that targets what you find.
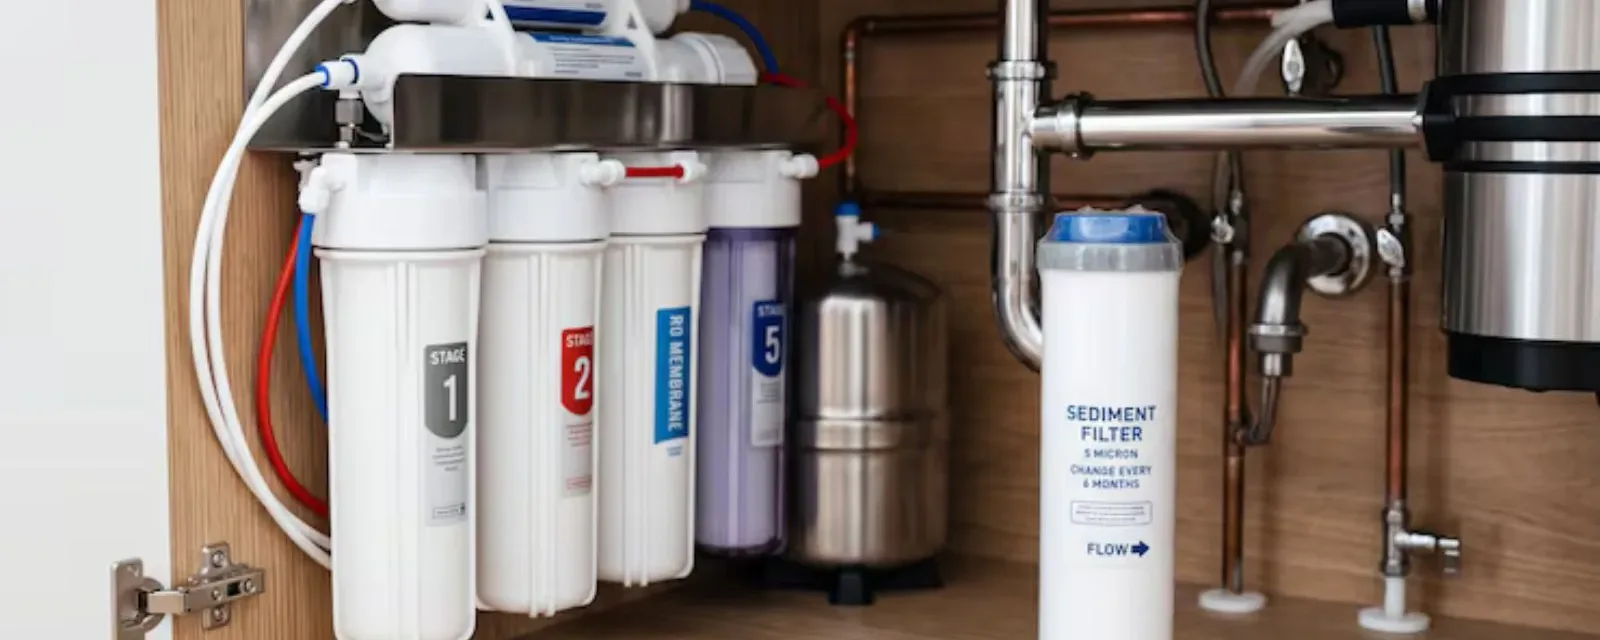
A simple carbon block cartridge improves taste and odor and reduces chlorine. A reverse osmosis system, or RO, adds a membrane that removes dissolved solids and many other contaminants, and it stores purified water in a small tank. RO also sends a stream of wastewater to the drain, which matters for the install.
A filter does not soften water. If scale on fixtures is your complaint, a filter is the wrong tool and a softener may be the answer.
Carbon filter or RO, a quick comparison
Both fit under a typical kitchen sink. The choice depends on your test results and your cabinet space.
| System | What it does | What to plan for |
|---|---|---|
| Single carbon cartridge | Reduces chlorine, taste and odor at one faucet | A cold supply tee and a small footprint |
| Multi-stage carbon | Adds sediment and finer carbon stages | Larger housings and more cartridges to change |
| Reverse osmosis | Membrane filtering with a storage tank | A drain saddle, a faucet hole and room for the tank |
| RO with remineralizing stage | Adds back minerals for taste | One more cartridge and a longer tube run |
If your test shows nothing unusual, a plain carbon filter is often enough. Spend on RO only when the results call for it.
Tools and parts to lay out first
Most kits include tubing and fittings. The tools are what people forget.
- Adjustable wrench and channel lock pliers. For the supply tee and the shutoff valve.
- Drill and a spade or hole bit. RO systems need a separate faucet, and the hole size depends on the faucet shank.
- Tubing cutter. A clean square cut helps push-fit fittings seal.
- Teflon tape. Wrap threaded joints that call for it, and skip it on compression fittings.
- Bucket and towels. The supply line and the housings hold water.
- Marker and a tape measure. Plan where each housing and the tank will sit before you mount anything.
A new angle stop is worth having in case the old one fails when you turn it. Shutoffs that have not moved in years often drip or stick.
Rather not drill the countertop?
Call the line and our dispatcher will line up a licensed plumber for the install.
Planning the cabinet before you drill
Open the cabinet and clear everything out. A garbage disposal, a trash pullout and a dishwasher hose all compete for the same space, and an RO tank is about the size of a small bucket. Sketch where each part will go before you mount a bracket.
Check the cold line and the drain next. The cold line should have a working angle stop with at least a few inches of clear supply tube. The drain saddle needs a straight vertical section of tailpiece above the P-trap, so a disposal tailpiece or a short trap arm may leave no good spot.
If the layout does not work on paper, it will not work with a drill in your hand. Moving the tank to an adjacent cabinet with longer tubing is a common fix.
Install steps, from shutoff to first rinse
Read the manual that came with your unit, since layouts differ. The order below suits most kits.
- Shut off the cold supplyClose the angle stop under the sink and open the cold tap to drain the line. If the stop will not close, close the main shutoff to the house instead.
- Mount the housingsScrew the mounting bracket into the cabinet wall or side panel, then attach the housings or manifold at the height shown in the manual.
- Add the supply teeDisconnect the cold supply line from the faucet and place a tee fitting between the angle stop and the line. Connect the filter feed tube to the tee.
- Drill the faucet holeFor RO, mark the spot, drill through the sink or counter with a bit sized for the faucet shank, and seat the faucet with its washers. Protect the finish with tape. Stone and quartz tops are a job for someone with the right bit.
- Install the drain saddleClamp the saddle on the vertical tailpiece above the P-trap, drill through the pre-marked hole, and connect the drain tube. Do not drill below the trap or on the trap arm.
- Connect the tank and tubingCut the tubes square, push them fully into each fitting, and tug to confirm they are locked.
- Open slowly and checkOpen the angle stop, then the tank valve, and look at every fitting. Run the faucet until water runs clear, then flush the system as the manual directs.
Leaks, noises and slow flow after the install
New systems often drip at a push-fit fitting that was not fully seated. Dry each joint with a paper towel, and see where the first bead of water forms. Then pull the tube out, recut it square and push it in again to the stop.
A gurgling sound from the drain is normal with RO when the membrane flushes. A constant trickle after the tank is full is not, and it usually means a shutoff valve or check valve that needs service. A slow faucet in the first few days can also come from air in the line, which clears after a few minutes of running.
Check under the sink again after 24 hours and once a week for the first month.
Keeping the filter working
Filters fail quietly. A clogged cartridge looks like a normal tap.
Change cartridges on schedule
Follow the maker's interval, or sooner when flow drops or taste returns. Write the date on the housing.
Sanitize at each change
Wipe the housing and use the manufacturer's sanitizer on the lines, since a filter holds moisture.
Replace the RO membrane
Membranes last longer than cartridges but not forever. Rising water spots or a salty taste suggest it is time.
Check the tank pressure
An RO tank that runs out quickly may have lost its air charge.
Where a plumber helps
Some parts of the job go smoother with a pro. Drilling stone countertops, tapping a drain on a tight cabinet and replacing a corroded angle stop are common sticking points. Our water filtration service includes under-sink systems sized after a water test.
If the cabinet needs a new supply line, a new shutoff or a dedicated faucet location, a crew handling plumbing installation can rough that in. Ask for a clear price before the work starts.
Water quality reports around Shafter
The City of Shafter provides water service to residential and commercial customers. We do not state its water source or hardness here, so ask the City of Shafter Utility Services for its annual water quality report, and compare it with a test of your own tap. That shows what your filter needs to remove.
Nearby, the City of McFarland posts water testing reports on its website, including quarterly 1,2,3-trichloropropane reports, which residents of the McFarland service area can read there. Wasco homeowners, covered by the Wasco emergency plumbing page, should ask their own provider.
Source type: City of Shafter Utility Services page and City of McFarland water testing reports page
Under-sink filter questions
Do I need to test my water before installing a filter in Shafter, CA?
Yes. We do not state hardness or contaminant levels for Shafter, so test your tap and ask the City of Shafter Utility Services for its annual water quality report. The results tell you whether a carbon filter or RO is the right fit.
Can I install an RO system on a granite countertop?
You can, but drilling stone needs a diamond or carbide bit and steady hands. Many homeowners use an existing sink hole or a soap dispenser hole instead. If neither is available, have a plumber drill it.
Will an under-sink filter reduce my water pressure?
A little at the filtered faucet, yes. Carbon cartridges barely affect flow, while RO delivers water slowly from the tank. Whole-house pressure should not change, since the filter only treats the cold line under the kitchen sink.
How often should I change the cartridges?
Follow the maker's schedule, which is often every six to twelve months for carbon and longer for RO membranes. Change sooner if flow drops or taste changes.
Do I need a permit to add a filter?
Permit rules vary. A simple filter on the cold line may differ from new plumbing. Ask the City of Shafter Building and Safety Division whether your project needs a permit.
If the install gets complicated, Call (855) 575-2890 and our dispatcher will arrange a licensed plumber.