
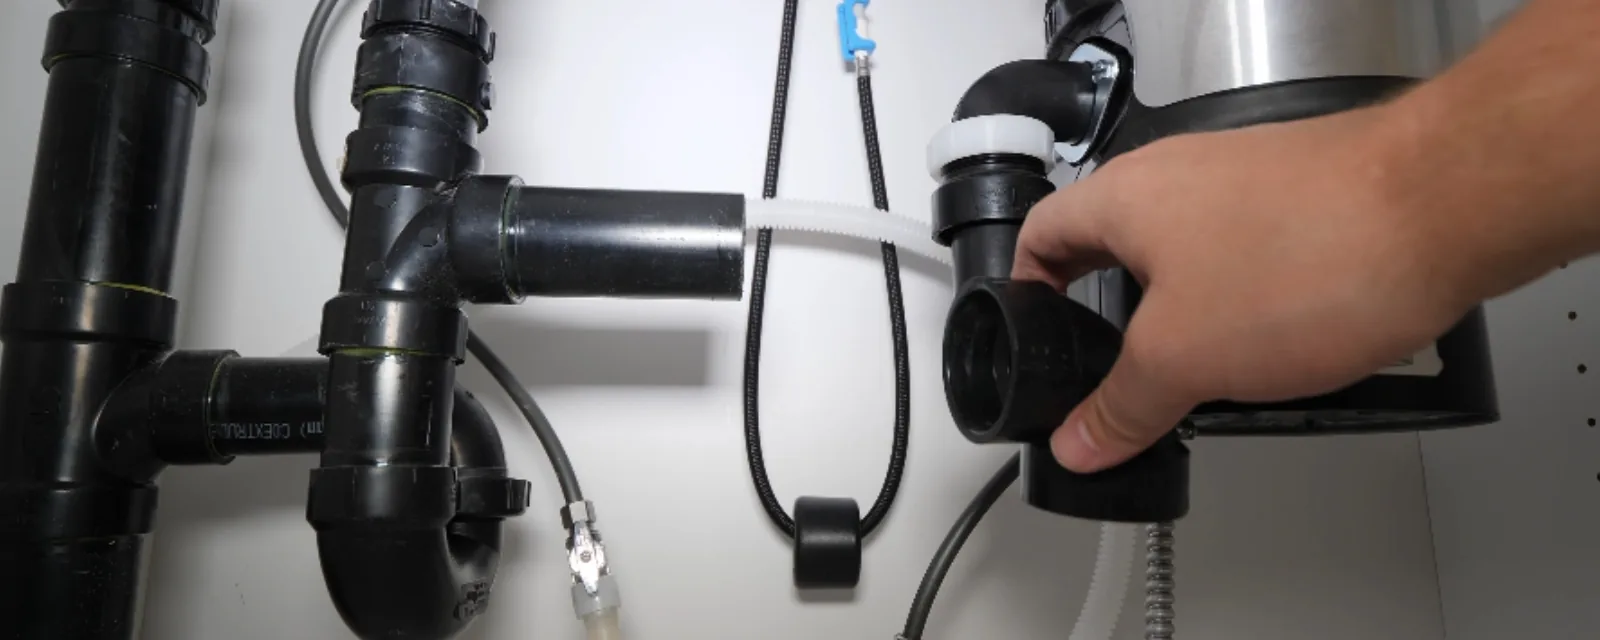
Pick the disposal before you pick up a wrench
A garbage disposal grinds food scraps under the kitchen sink so they wash down the drain. Most homeowners in Shafter, CA can replace one in an afternoon if the sink plumbing is in decent shape and a power source already exists. A first time install, with no outlet or switch, is a bigger job.
Horsepower is the first choice. A half horsepower unit handles light use. Three quarter and one horsepower models grind tougher scraps and run quieter, and they are heavier. Weight matters because the whole unit hangs from the sink flange by a mounting ring.
Next pick the feed type. A continuous feed disposal runs while you hold a wall switch on and accepts scraps as it goes. A batch feed disposal runs only when the stopper is locked in place, which makes it safer around children. Check that your sink has a standard three and a half inch drain opening.
Three mounting styles and what they mean for you
The mount is how the disposal hangs from the sink. Matching the new unit to the old mount saves time, but you can switch styles if you change the flange too.
| Mount type | How it attaches | Good to know |
|---|---|---|
| Three bolt | Three screws pull a mounting ring up against the flange | Common on older units and very secure |
| Quick lock | Tabs twist and lock onto a ring in a quarter turn | Fastest for swaps and easy to remove later |
| Sink flange only | The flange and gasket seal the sink and a snap ring holds the rest | Needed with new sinks that lack a flange |
Whichever style you buy, keep the old mounting ring and flange if they are in good shape. Many replacement disposals reuse them, and the unit's own box lists what is included.
Tools and parts to set on the counter
The box rarely includes everything. Gather the extras so you are not driving to a store with the sink torn apart.
- Plumber's putty. It seals the sink flange. A silicone ring works on some flanges, so follow the label.
- Channel lock pliers and a screwdriver set. You need them for slip nuts, the mounting ring and the wire cover.
- A hex key. Most disposals ship with a small one that doubles as a jam clearing wrench.
- A three prong appliance cord kit. Many units arrive without a power cord, so you buy one or wire the unit directly.
- A non contact voltage tester. It confirms the wires are dead before you touch them.
- Hacksaw and a bucket. Drain tubes are often trimmed, and the old trap holds water.
- A new dishwasher drain connector. Choose a hose that fits the disposal's inlet. Buy a clamp if the kit lacks one.
Rather not wrestle it under the sink?
Call the line and our dispatcher will line up a licensed plumber for the swap.
From dead power to first test run
Work in this order. Each step sets up the next, and the order keeps water away from live wires.
- Kill the powerSwitch off the breaker feeding the disposal circuit. Confirm with the voltage tester at the outlet or at the wires. A wall switch off is not enough.
- Clear and disconnectEmpty the cabinet. Loosen the slip nuts on the trap and discharge tube, and set a bucket underneath. Unplug the cord or unscrew the wire cover and disconnect the wires.
- Remove the old unitHold the disposal while you release the mounting ring, because it drops quickly. Set it aside, then take off the ring, the backup ring and the gasket.
- Clean and reseat the flangeScrape old putty from the sink opening. Roll a rope of fresh putty around the new flange, press it in from above, and install the gasket, backup ring and mounting ring from below. Tighten evenly and wipe off the squeeze out.
- Open the dishwasher knockoutIf a dishwasher drains into the disposal, use a screwdriver and light hammer to knock out the plug inside the inlet. Fish the plug out so it cannot clog the line.
- Wire the unitRemove the cover plate on the bottom. Connect white to white, black to black and the green screw to the ground wire. Tuck the wires into the plate and replace the cover.
- Hang the disposalLift the unit up to the mounting ring and rotate it until it locks. Turn the flange once so the discharge outlet lines up with the trap arm.
- Connect the drain and the dishwasher hoseFit the discharge tube with its rubber gasket and tighten the slip nut. Clamp the dishwasher hose on the knockout inlet. Loop the hose high under the counter before it enters the inlet.
- Restore power and testRun water first with the power still off and watch for drips at every joint. Then switch on the breaker, run the disposal with cold water flowing, and recheck the seals.
The dishwasher knockout everyone forgets
The knockout is a thin plastic plug inside the disposal's side inlet. Leave it in place and the dishwasher cannot drain, which means a puddle in the dishwasher after every cycle. If you do not own a dishwasher, leave the plug in.
Remember to remove the plug itself, not just punch a dent in it. A loose plug falls into the grinding chamber and jams the first run. Hold the unit steady with one hand and tap the plug in with a screwdriver, then reach it with needle nose pliers once the unit is off and unplugged.
Some kitchens use an air gap on the countertop instead of a high loop. Either is a known way to keep dirty sink water from backing into the dishwasher. Keep whichever your home already has.
Plug in or hardwire
Many installs connect the disposal to an outlet under the sink with a cord kit. Others are hardwired through a conduit into the unit. Both can be fine, but the connection must be solid and the circuit must be right for the load.
We handle the plumbing and the standard hookup on a unit that already has a proper outlet or junction box. Adding a new circuit, a new switch or an outlet that does not exist yet is work for a licensed electrician. If your kitchen has no switch for the disposal, stop and arrange that first.
Hands, blades and breaker rules
A disposal does not have sharp blades like a blender, but its impellers can still crush fingers. Treat the chamber as off limits at all times.
- Never put a hand into the chamber, even with the breaker off. Use tongs or pliers instead.
- Always lock the breaker or tape the panel so no one switches it back on while you work.
- Use the hex key under the unit to turn the impeller by hand if it hums but does not spin.
- Stop and call a plumber if a mounting ring will not release or a cracked flange leaks.
When the swap is bigger than it looks
A slow sink drain behind the disposal, a corroded trap arm or a drain pipe that no longer lines up can turn a one hour job into half a day. Our garbage disposal repair and installation service covers replacements, stuck jams and leaks at the flange, the bottom seal and the dishwasher connection.
If the install involves moving the sink, adding a kitchen sink from scratch or running new supply and drain lines, that is plumbing installation work. A plumber can rough in drain lines, set shutoffs and check venting while the cabinet is open.
Our dispatcher also takes calls from Wasco, roughly 10 miles from Shafter, and McFarland, roughly 15 miles away. If you are unsure how big your job is, Call (855) 575-2890 and describe what is under your sink.
Permits and your Shafter kitchen
Rules differ for a simple like for like disposal swap and for new plumbing or new wiring. We do not state which jobs need a permit. Ask the City of Shafter Building and Safety Division at City Hall whether your project needs a permit and an inspection.
Do that before you buy parts if you plan to change drain lines or add a circuit. A short call can save you from tearing out finished work later.
Source type: City of Shafter Building and Safety Division page
Common questions before you start
Do I need a permit to install a garbage disposal in Shafter, CA?
Permit rules vary with the scope of the work. A simple swap of the same type of unit may be treated differently than new plumbing or wiring. Ask the City of Shafter Building and Safety Division at City Hall whether your job needs a permit before you start.
Can I connect a disposal and dishwasher to the same drain?
Yes, most kitchens do. The dishwasher hose connects to the knockout port on the disposal, and the hose loops high or uses an air gap. If the dishwasher fills with dirty water, the knockout is probably still blocked or the loop is missing.
How long does a disposal install take?
A like for like swap with the same mount and an existing outlet usually takes one to two hours for a careful homeowner. A first time install with a new outlet, switch or drain changes takes much longer and may need other trades.
Why does my new disposal leak?
Check three places in this order. The sink flange can leak if the putty was thin or the mounting ring is loose. The discharge tube joint leaks when the gasket is missing. The dishwasher hose clamp can leak if the hose is not fully seated. Dry each joint and watch it while you run water.
Can a disposal go on a septic system?
Some systems tolerate a disposal and many homeowners avoid one because food solids fill a septic tank faster. If your home is on septic, contact Kern County Environmental Health or your septic service about local guidance before you buy.
If your disposal install hit a snag, Call (855) 575-2890 and our dispatcher will help you decide the next move.